Monday 11 June 2012

Reproducing an image


This is an original image of Hayley Williams, it is the cover of one of her albums.


Wednesday 7 March 2012

Hand painting images

History on hand painting photographs


Most photographs were taken in monochrome so to make the photographs look more realistic or artistic they hand coloured them. At first a mixture of gum arabic and pigments were used to colour the photographs and sometimes a coloured powder was fixed to the surface of the photograph by application of heat.

 
                                              monochrome                             hand-coloured


Numerous materials were used to colour in the photographs, these include; basic dye, watercolours, oils and crayons/ pastels.


Today we were set a task to take a photo of a person, in full length, and put it onto photoshop. We had to change the photograph to black and white to then print out and paint over.

Original photograph
 
Changed to black and white

Painted over


I used bright colours to paint over the photograph, which makes the image look like pop art. As I painted straight onto the printed image the paint didn't absorb into it due to the amount of ink used causing the water to run off it.

Wednesday 29 February 2012

3D Photography


These photographs are off the behance.net site. They are 3D photographs, which can be seen better using the 3D glasses. 


Stereoscopic vision, stereopsis and stereovision are different names for a single phenomenon. 3D photographs are made by fusing together two different images and the brain produces an image from it. The word 'stereo' means solid and firm, which is an indication towards the three dimensions of a solid object. 

These are some images that I found off Google.


This image of the Avatar characters appears to follow you when you move whilst wearing the glasses. It comes out very sharp and the quality is really good making the photograph outstanding. 


How To Make A 3D Image

Drag an image into Photoshop
Duplicate the layer
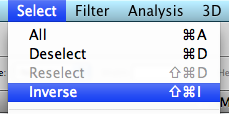
Select top layer (Background copy)


Image- Adjustments- Levels 


Change the drop box to red


Change both the level boxes to 0


Then select the Bottom layer


Change the drop box to Green


And the levels to 0


DON'T PRESS OK YET!

Then just change the drop box to Blue 

Again changing the levels to 0


NOW PRESS OK


Select the TOP layer (Background copy) and change it from normal to Screen


Then click on the Move Tool 


Move the top picture a small bit down and to the right


This should make the colours from the layers show through, making it look 3D, you can check this by using a pair of 3D glasses.

Final Image


Crop the image so the red line around the top and side of the photograph is removed, this neatens off the image and makes it look more professional. I enjoyed creating the 3D image and the outcome worked well as my image appeared 3D with glasses on. Also creating a 3D image was quite simple when told how to do it properly. 


This technique can also be done by taking a photograph when looking through the left eye and then taking another photograph looking through the right eye. Then the layers are put over each other and the process is repeated like the previous one, this also creates a 3D image. 


Wednesday 22 February 2012

Manipulating an Image

Choose the Marquee tool- oval shape


Select- modify – feather

Change to 150 


Select- Inverse


Filter- Blur – Radical Blur


Zoom or Spin
Change to 80-90 


Press OK


Repeat the process as before..


But change to Zoom instead


Press Ok


To add a border, use the same Marquee tool and select the middle of the photograph.

Then feather the image


Image - Adjustments - Hue/Saturation

       
Inverse the selection                                        

                                             
Slide the 'lightness' bar to the left to make it as dark as you want. 


To blur the outside of a photograph...

Select the middle of the photo with the marquee oval tool


Filter - Blur - Gaussian Blur


Adjust the strength of the Blur 


Digital Manipulation- Research

These are a few examples of already existing digitally manipulated images. the use of trick photography and digital manipulation helps create unusual images, which are impossible naturally produce.


The notes have obviously been added to this photograph, by cutting and pasting each note separately. It looks very effective and well done so the photograph looks very realistic although this would never happen in 'real life'.


This photograph shows the elephant in a different way to what we normally see it. The elephant is stood on its back legs catching a butterfly in a net, which makes the elephant seem weightless.


I love this photograph as it shows beauty within a cigarette. Most people class cigarettes as dangerous to your health but by manipulating this images and adding in a number of buildings and other objects it makes the cigarette look quite beautiful. 


This photograph could have been manipulated using photoshop and just by simply adding colour onto a new layer and overlaying them. The water droplet could have been cut from an existing photograph and and pasted onto this one. I like the bold colours used in this photograph as it makes it very eye catching. This photograph is heavily manipulated as no ones eyes and lashes could ever look like this naturally.


This photograph is disturbing.